AI Writing Assistant: How It Works and When to Use It
June 25, 2026
Learn how AI writing assistants work, what they can and can't do, and how students and professionals use them to write faster and think clearer.

September 5, 2025
Virtual education has transformed how students learn, collaborate, and study, making recording capabilities essential for academic success. Whether you're capturing important lectures, documenting group discussions, or creating study materials, having the right recording setup can make the difference between struggling to keep up and excelling in your courses. This guide will walk you through practical recording techniques, organizational systems, and workflows that every remote learning student should master.
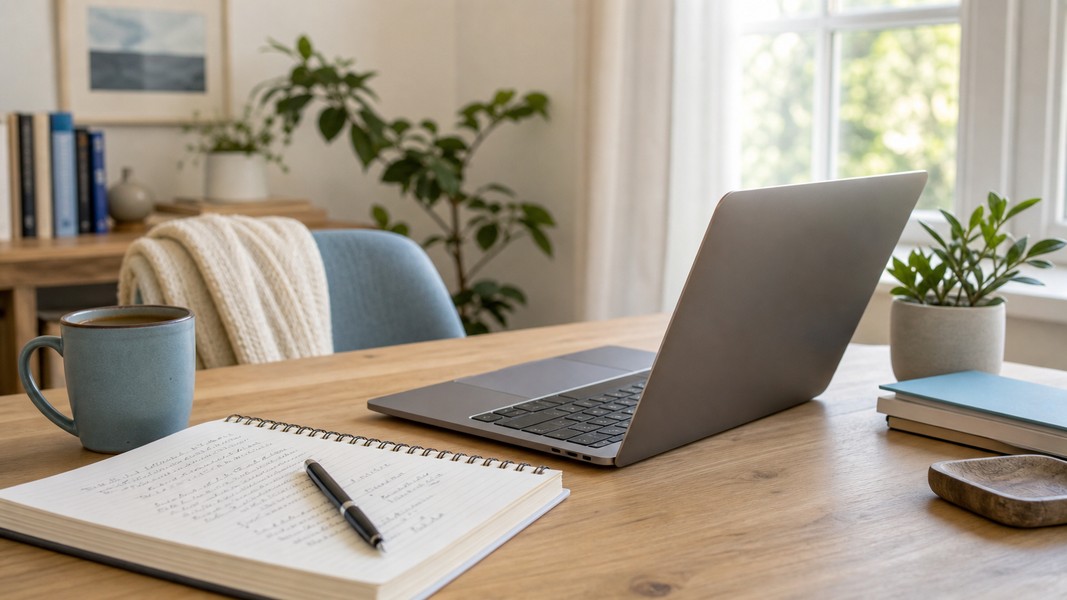
Creating an effective recording space doesn't require expensive equipment or a professional studio. Start by choosing the quietest room in your home, preferably one with soft furnishings like carpets, curtains, and upholstered furniture that naturally absorb sound. If you're dealing with echo issues, try hanging blankets on the walls or recording in a closet surrounded by clothing. These simple adjustments dramatically improve audio quality without spending money on acoustic treatments.
Position yourself strategically in your recording space. Sit facing away from windows to avoid backlighting issues during video recordings, and place your computer on a stable surface to prevent vibrations from typing or movements. Keep a glass of water nearby but away from electronics, and turn off notifications on all devices to prevent interruptions. Creating this dedicated space signals to your brain that it's time to focus, improving both recording quality and your concentration during sessions.
Temperature control plays a surprisingly important role in recording comfort and quality. Set your room temperature before starting lengthy recording sessions, as air conditioners and heaters create background noise that can distract listeners. If you must run climate control, position yourself as far from vents as possible and consider using a directional microphone that faces away from noise sources. During breaks between recordings, you can adjust temperature as needed, but maintain consistency during actual recording periods.
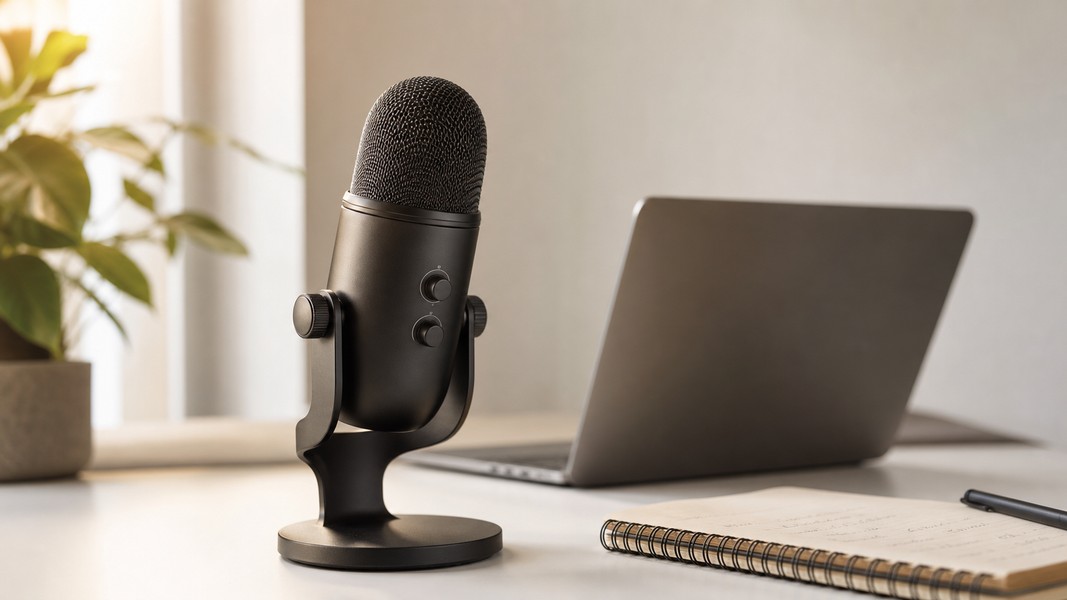
Good audio quality transforms average recordings into professional-sounding study materials. While built-in laptop microphones work in emergencies, investing in even a basic USB microphone significantly improves your recordings. Position your microphone approximately six to eight inches from your mouth, slightly off to one side to avoid breathing directly into it. This positioning captures clear speech while minimizing unwanted breath sounds and plosives.
Before important recording sessions, spend five minutes conducting audio tests. Record yourself speaking at normal volume, then play it back to check for issues like background noise, echo, or volume problems. Adjust your microphone gain so that your voice peaks around seventy percent of the maximum level, leaving headroom for occasional louder moments without distortion. This practice helps you identify and fix problems before they affect important recordings.
Background noise remains one of the biggest challenges for home recording. Schedule recording sessions during quieter times of day when family members or roommates are less active. Close windows to block outside noise, and temporarily unplug noisy appliances like refrigerators if they're audible in your recording space. For persistent noise issues, consider using noise reduction features in your recording software, though be careful not to overprocess your audio, which can make voices sound artificial or hollow.
Successfully recording webinars and virtual lectures requires both technical preparation and strategic thinking. Start each semester by testing your online recorder capabilities with your institution's preferred platforms. Most universities provide access to platforms like Zoom or Microsoft Teams that include built-in recording features. Familiarize yourself with these tools during low-stakes situations rather than discovering limitations during critical lectures.
Create a pre-recording checklist that you follow before every important session. Check your internet connection stability, close unnecessary browser tabs and applications to free up system resources, and ensure you have sufficient storage space for the recording. Start your recording software a minute before the session begins to capture any early comments or technical instructions from instructors. This buffer also gives you time to verify that the recording is actually working before crucial content begins.
During live sessions, take advantage of dual-recording strategies when possible. Use your platform's cloud recording feature as your primary method, but simultaneously run a backup recording on your local machine using software like OBS Studio or your operating system's built-in screen recorder. This redundancy protects against technical failures and ensures you never lose important content. After sessions end, immediately download cloud recordings to your personal storage, as many platforms automatically delete recordings after specific time periods.
Group recordings present unique challenges that require coordination and clear communication. Before recording group study sessions, establish ground rules with all participants. Decide who will manage the technical aspects of recording, how you'll handle interruptions or technical difficulties, and what happens to recordings after the session ends. Creating these agreements upfront prevents conflicts and ensures everyone feels comfortable participating.
Implement a structured format for group recordings that maximizes their value as study materials. Begin each session with a brief agenda review, stating the date, participants, and topics to be covered. This introduction helps orient future listeners and makes recordings easier to organize later. Assign timekeeper and note-taker roles to group members, with the note-taker creating timestamps of important discussion points. These timestamps become invaluable when reviewing recordings before exams.
Technical coordination in group settings requires extra attention to audio quality. Ask all participants to use headphones to prevent echo and feedback loops. If someone's audio quality is poor, suggest they mute when not speaking and use the chat function for questions. Designate one person to monitor audio levels and alert the group if someone becomes inaudible or if background noise becomes disruptive. Regular audio checks every thirty minutes help maintain consistent quality throughout longer sessions.
Creating your own study recordings transforms passive learning into active engagement with material. Develop a routine for recording yourself explaining concepts immediately after lectures or study sessions. Speaking concepts aloud reveals gaps in understanding that silent review might miss. These recordings also serve as personalized study guides that you can review while commuting, exercising, or doing other activities.
Structure your personal study recordings for maximum effectiveness. Begin each recording by stating the topic, related lecture or textbook chapter, and your learning objectives. Present information in your own words rather than simply reading notes, as this paraphrasing process deepens understanding. Include examples, mnemonics, or connections to previous material that help you remember concepts. End each recording with a summary and a list of questions you still need to answer.
Experiment with different recording formats to find what works best for your learning style. Some students benefit from recording themselves teaching concepts to an imaginary audience, while others prefer a question-and-answer format where they pose and answer their own study questions. Try recording mind-mapping sessions where you verbally explore connections between ideas, or create audio flashcards by recording terms and definitions with pauses between them. The key is finding formats that keep you engaged and make review sessions productive.
Cloud-based recording solutions offer flexibility and security that local-only storage cannot match. Configure your recording software to automatically upload to cloud storage immediately after sessions end. This automation prevents data loss from hardware failures and makes recordings accessible across all your devices. Services like Voice Memos excel at this automatic organization, intelligently categorizing recordings and syncing them across devices without manual intervention.
Develop a consistent file naming system that makes recordings instantly identifiable. Include the date in YYYY-MM-DD format for automatic chronological sorting, followed by course code, topic, and any relevant keywords. For example: "2025-09-15_PSYC101_Memory-Encoding_Lecture-Notes". This systematic approach eliminates time wasted searching for specific recordings and helps you track your study progress throughout the semester.
Create a folder hierarchy that mirrors your course structure. Organize recordings by academic year, then semester, then individual courses, with subfolders for lectures, study groups, and personal review sessions. Within each subfolder, consider creating additional categories for different content types, such as problem-solving sessions, concept explanations, or exam preparation. This organizational structure scales effectively whether you have dozens or hundreds of recordings.
Storage management becomes critical as recording libraries grow throughout your academic career. Regularly review your recordings and delete redundant or low-quality content that no longer serves your learning goals. Keep original lecture recordings, but consider deleting multiple takes of personal study sessions once you've created a final version. This selective retention prevents storage overflow while preserving valuable content.
Implement a tiered storage strategy based on content importance and access frequency. Keep current semester recordings in fast, easily accessible cloud storage. Move previous semester materials to archival storage solutions that offer more capacity at lower cost. Create local backups of crucial recordings, such as thesis research interviews or capstone project meetings. This distributed approach protects against data loss while managing storage costs effectively.
Monitor your recording quality metrics regularly to maintain consistency across your library. Check file sizes to ensure recordings aren't unnecessarily large, which wastes storage and complicates sharing. Listen to snippets from recent recordings to verify audio quality hasn't degraded due to equipment issues or environmental changes. Address problems immediately rather than discovering unusable recordings when you need them most for exam preparation.
Understanding privacy regulations and ethical considerations protects both you and your classmates when recording educational content. Most institutions allow students to record lectures for personal study purposes, but sharing recordings often requires explicit permission. Before distributing recordings beyond personal use, verify your institution's policies and obtain necessary consents from all identifiable participants.
Practice responsible recording by informing group study partners when you plan to record sessions. Offer alternatives for students uncomfortable with recording, such as participation through text chat or providing written summaries instead of verbal contributions. Respect requests to pause recording during sensitive discussions or when personal information might be shared. These courtesies maintain trust within your learning community while still capturing valuable educational content.
Secure your recordings appropriately based on their content and participants. Use institutional platforms rather than public video hosting sites for recordings containing other students' voices or images. Password-protect sensitive recordings and share access only with authorized individuals. Set calendar reminders to delete recordings after they've served their academic purpose, particularly those containing other students' contributions. This lifecycle management demonstrates respect for privacy while maintaining useful study materials.
Different academic scenarios require adapted recording strategies for optimal results. For fast-paced lectures with dense technical content, prioritize audio clarity over video quality, as you'll primarily need to capture spoken explanations and verbal cues. Use higher audio bitrates and consider recording in an audio-only format to reduce file sizes and processing demands. This approach works particularly well for mathematics or science courses where instructors verbally explain problem-solving processes.
Laboratory demonstrations and practical sessions benefit from video recording with multiple angles when possible. Position your primary recording device to capture the overall workspace, then use your phone as a secondary camera for close-up detail shots. Synchronize these recordings later using audio waveforms or verbal countdown cues. This multi-angle approach helps you review complex procedures and identify subtle technique details that single-angle recordings might miss.
For language learning courses, implement specialized recording techniques that capture pronunciation nuances. Position your microphone closer than usual to capture subtle phonetic differences, and record at higher quality settings to preserve frequency details important for accent work. Create paired recordings where you first play native speaker examples, then immediately record yourself attempting the same phrases. This immediate comparison accelerates pronunciation improvement and helps identify specific areas needing practice.
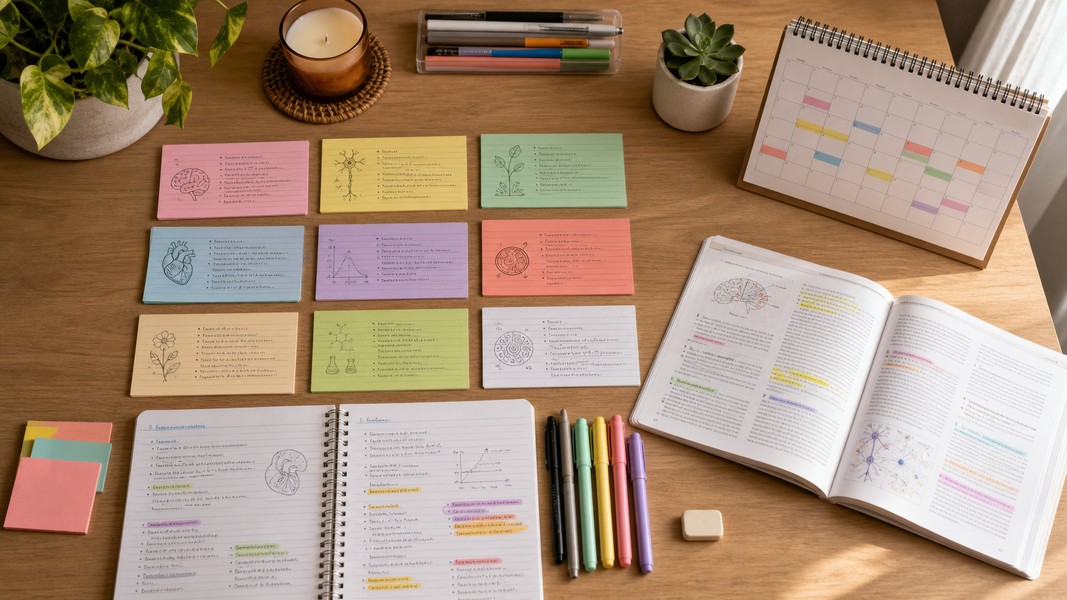
Transform your recordings into searchable study resources using transcription and indexing techniques. Many platforms now offer automatic transcription features that, while imperfect, provide searchable text for finding specific topics within lengthy recordings. Review and correct these transcriptions for important recordings, as this editing process reinforces learning while creating accurate reference materials.
Develop a timestamp index for frequently accessed recordings. Create simple text documents listing key topics and their corresponding timestamps, formatted like "15:30 - Photosynthesis light reactions begin" or "42:15 - Professor explains exam format". These indices save hours during exam preparation by eliminating the need to scrub through entire recordings searching for specific information. Share these indices with study groups to multiply their value.
Enhance recording value by creating supplementary materials during or immediately after recording sessions. Take screenshots of important slides or diagrams shown during recordings, naming them with corresponding recording timestamps. Create mind maps that visualize relationships between concepts discussed in recordings. Write summaries highlighting key takeaways and action items from each recording. These complementary materials make recordings more actionable and easier to review quickly.
Invest strategically in equipment upgrades based on your specific needs and budget constraints. If you primarily record audio for note-taking and study purposes, prioritize microphone quality over camera upgrades. A free voice recorder website might work initially, but consider upgrading to dedicated recording software as your needs become more sophisticated. Research equipment reviews from other students rather than professional content creators, as educational recording has different requirements than entertainment content.
Establish maintenance routines that prevent technical failures during critical recording sessions. Weekly, test all recording equipment and software to identify issues before they affect important sessions. Update recording software regularly, but avoid updating immediately before important recordings in case new versions introduce bugs. Keep backup equipment like spare batteries, cables, and even a basic backup microphone for emergencies. These preparations prevent missed recording opportunities that could impact your academic performance.
Create personal recording guidelines that standardize your approach across different courses and scenarios. Document your optimal settings for different recording situations, including microphone placement, gain levels, and software configurations. Note which recording formats work best for different purposes, such as using an internet voice recorder for quick notes versus dedicated software for lengthy lectures. This standardization reduces setup time and ensures consistent quality across your recording library.
Maximize recording value by establishing structured review schedules that reinforce learning over time. Implement spaced repetition by reviewing recordings at increasing intervals: within 24 hours of creation, after three days, after one week, and finally before exams. This schedule strengthens memory consolidation while identifying concepts requiring additional study. Mark recordings with review dates to track your progress through the material.
Vary your review methods to maintain engagement and accommodate different learning contexts. Listen to recordings at increased playback speeds for familiar material review, using saved time to cover more content. Alternatively, slow down playback for complex concepts that require careful consideration. Create active review sessions by pausing recordings to answer embedded questions or solve practice problems before hearing the recorded solutions.
Use recordings strategically during different study phases. During initial learning, focus on complete playthrough to understand overall concepts and relationships. For exam preparation, use indices and timestamps to target specific topics needing reinforcement. During the final review, listen to the summary recordings you've created, which distill essential information from longer source recordings. This graduated approach ensures recordings remain valuable throughout your learning journey.
Mastering recording techniques for remote learning empowers you to take control of your education and build a personalized library of study materials perfectly suited to your learning style. The transition to virtual education doesn't have to mean sacrificing educational quality. By implementing these recording strategies, organizational systems, and review techniques, you create a robust learning environment that captures and preserves valuable educational content for immediate study needs and future reference.
Remember that developing effective recording habits takes time and experimentation. Start with basic techniques and gradually incorporate advanced strategies as you become comfortable with the fundamentals. Focus on consistency rather than perfection, as regular recording practice naturally improves both your technical skills and your ability to create valuable study materials. Your future self will thank you when exam time arrives and you have a well-organized library of high-quality recordings ready for review.
The investment you make in developing your recording capabilities pays dividends throughout your academic career and beyond. These skills transfer to professional environments where virtual collaboration and content creation are increasingly valuable. Start building your recording expertise today, and transform every virtual learning opportunity into a permanent resource for your ongoing educational success.
Discover more insights and tips to enhance your productivity
Learn how AI writing assistants work, what they can and can't do, and how students and professionals use them to write faster and think clearer.
Learn 7 proven memorization techniques used by students and experts. Science-backed strategies to remember more and study more efficiently.
The best AI transcription software in 2026, tested and ranked. Compare accuracy, features, and use cases for professionals, researchers, and teams.